
Loading the Stanford Bunny

I decided to get a little framework set up that would let me play around with some graphics code. As a result, I decided that step one would be to get everyone's favorite test model, the Stanford Bunny, loaded and rendering. I'd never actually used the bunny or any of the other Stanford models before so after a little research into where to access them and what format they were in, I came up with a "pipeline" for loading them into my application. I wouldn't call it a great solution, but it worked pretty well for getting something up and running to play with.
The first step is to get a hold of the model from the Stanford 3D Scanning Repository website. This is also where you will find many of the other common test models such as Happy Buddha, Dragon, and Lucy. All of these models have been scanned from real world objects so each model has data files for the original scans and data files for the final mesh reconstructed from the scans. We only need the reconstructed meshes.
The models are all stored in the PLY polygon file format. The format itself isn't that complex to write a parser for, but due to the format supporting custom vertex formats per file, you do need to be a bit careful. I decided that I would rather convert the files to the more common Wavefront OBJ format. Writing a parser for the basic OBJ features is fairly simple and OBJ files are natively supported by most 3D modeling programs.
I should also point out that the supplied Stanford models don't store any vertex normals. Whether you decide to write a PLY or OBJ file parser, it would be nice to have the vertex normals stored in the file so you don't need to generate them on load.
The next step is to find an application (preferably free) that will let us add normals to a PLY file, or convert PLY files to another format such as OBJ files. Fortunately such an application exists and it will even let us tweak the data if needed. Blender is the open source solution to 3D modeling (at the time of writing this, the latest version is 2.49b). Being a free product, Blender isn't as easy to use as Maya or 3ds Max (not that Maya and 3ds Max are particularly easy to use in the first place). On the positive side, Blender supports importing and exporting PLY files without needing any additional plug-ins. Also to their credit, I found Blender surprisingly easy to install for an open source project even if it did require that I also install Python.
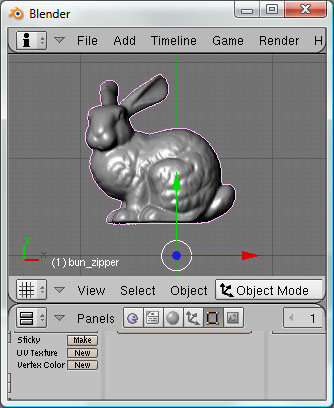
So after Blender is installed and launched, we can load in our models. I'm no Blender expert, but I'll give you the quick run through of how I ended up doing this. The first thing you will notice when Blender opens up is that there is a cube in the middle of the screen. Obviously someone on the Blender team was thinking "Chances are the users will want be wanting a cube every time they open this up so let me just simplify that for them." Genius. The first thing I do every time I load blender is delete this cube. Sounds simple enough. Click the cube, press the delete key. Almost. Blender is well aware that we probably don't really want to delete the object we just told it we want to delete so it pops up a context menu thing to slow us down with a confimation. So now the scene is empty and we can get rockin'.

Open up the "File" menu, select "Import" and then select "Stanford PLY (*.ply)..." Most other applications would open up a standard file dialog box here, but why do that when we can do something a bit less natural. Blender will replace your 3D view (who needed that anyway) with its limited file browsing window. If you are loading up the Stanford Bunny, you will want to find the "bun_zipper.ply" file you downloaded earlier. And for anyone who wasn't using computers in the 1990's, you might need to be informed that clicking the ".." file will go up a folder. If your PLY file is on another drive or somewhere crazy like your desktop, you'll want to click the odd scroll bar arrow looking icon at the top left to jump there.
Now that you've found your PLY file, I'm sure you tried to double click it to open it. Too bad. You lose. After clicking the file and admiring how it doesn't even highlight to indicate that it is selected, click the "Import PLY" button at the top right. You should now see you're model back in the 3d view. You may need to zoom in or out with the mouse wheel depending on the scale of the model. If you dare learn how to use Blender, feel free to move, scale, or rotate the model to your pleasing.
We can now export the model with normals back out to a PLY file or to an OBJ file. Open up the "File" menu, select "Export" and choose either "Stanford PLY (*.ply)" or "Wavefront (*.obj)". It would have been nice if this window loaded back up the previous directory you browsed to, but we instead get some more practice navigating the hard drive with this beast. Go to the folder of your choice and type in the filename above. When you click the export button you will be presented with some options for what to export. For PLY files the "Normals" option should already be selected. For OBJ files you may want to click the "Triangulate" option if your file parsing code doesn't support n-sided polygons. You also need to click the "Normals" button for OBJ files if you want vertex normals.
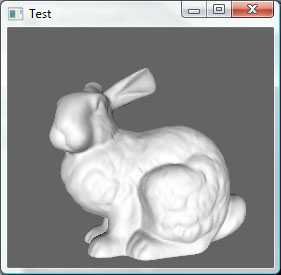
You now have the finest of test models to play with. Have fun.
Comments